Welcome to my cozy corner of the internet! Today, I’m excited to share my insights on how to use a planner to organize your life. I’ve been on a journey of productivity and organization, and I want to help you navigate yours too. Whether you’re new to planning or looking for fresh ideas, I’ll guide you through the steps that have worked wonders for me. Plus, I offer free printables to enhance your planning experience, so keep an eye out for those!
Why Use a Planner?
Before diving into the specifics, let’s chat about what a planner is. Simply put, a planner is a tool that helps you track your daily tasks, appointments, and goals. It can be a physical notebook or a digital app – whichever suits your style best. Using a planner can help you:
- Stay organized
- Manage your time effectively
- Reduce stress by having everything in one place
- Set and achieve personal goals
Now that we’ve established the importance of planners, let’s get into the nitty-gritty of using one effectively.
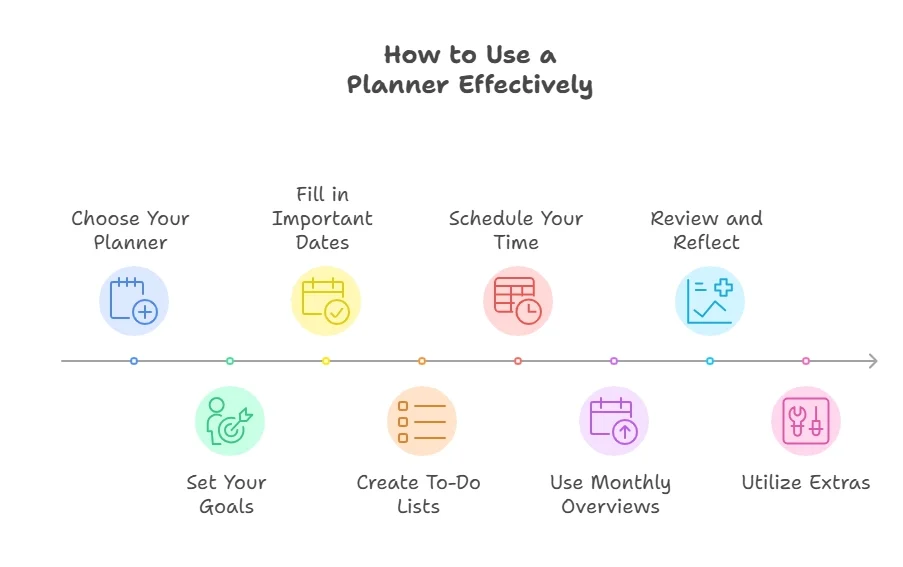
How to Use a Planner Effectively
Using a planner doesn’t have to feel overwhelming. Here’s how I break it down into manageable steps:

Step 1: Choose Your Planner
The first step in learning how to use a planner is selecting the right one for you. Here are some options:
- Daily planners: Great for detailed scheduling
- Weekly planners: Perfect for an overview of your week
- Monthly planners: Ideal for long-term planning
Consider what features are important to you, such as having a planner with a notes section, which can be incredibly handy for jotting down ideas or reminders. To help you, I wrote down some questions you can ask yourself:
- Do you need detailed daily pages or a broader weekly overview?
- Do extra features like trackers or goal-setting sections appeal to you?
- Would you prefer a simple design or something colorful and creative?
Step 2: Set Your Goals
Before filling in your planner, take some time to think about your goals. What do you want to achieve this month? This week? Write these down! Having clear objectives will guide how you fill out your planner.
Step 3: Fill in Important Dates
Once you have your goals set, it’s time to add important dates. This includes:
- Birthdays
- Anniversaries
- Appointments
- Deadlines
I usually dedicate the first few pages of my planner to jotting down these key dates so I can reference them easily throughout the year.
Step 4: Create To-Do Lists
To-do lists are essential for staying on track! Here’s how I organize mine:
- Daily tasks: Write down what needs to be done each day
- Weekly tasks: Plan out larger projects over the week
- Monthly tasks: Look ahead and prepare for bigger deadlines
I often break my tasks into categories like work, personal, and errands. This helps me visualize what needs attention each day.
For example, here’s how I use my daily pages:
- Start by listing your top three priorities for the day
- Block out time for important tasks
- Use the notes section for anything unexpected or reminders for tomorrow
If you’re interested in creating a structure that works for your day, check out my daily planner ideas printables. They’re simple but effective.
Step 5: Schedule Your Time
Now that you have your tasks laid out, it’s time to schedule them. Here’s how:
- Prioritize: Identify which tasks are most important
- Time block: Allocate specific times for each task
- Keep a list of tasks to tackle when you have extra time
- Be flexible: Life happens! Allow some wiggle room in your schedule
I love using weekly planner ideas for this step because it allows me to see everything at a glance without feeling overwhelmed.
Step 6: Use Monthly Overviews to Stay on Top of Big Goals
The monthly planner layout is great for seeing the bigger picture:
- Write down key events, deadlines, and recurring commitments.
- Set 2-3 main goals for the month and break them into smaller tasks.
- Plan ahead for special projects or seasonal activities.
I find my monthly pages are perfect for tracking long-term goals or habits I want to focus on. If you’re not sure where to begin, I have monthly planner ideas among my free printables that can help.
Step 7: Review and Reflect
At the end of each week or month, take some time to review what you accomplished. Ask yourself:
- What worked well?
- What didn’t?
- How can I improve next time?
This reflection process is crucial for learning how to use a planner effectively and making adjustments as needed.
Step 8: Utilize Extras
Many planners come with additional features like habit trackers or goal-setting pages. Make sure to take advantage of these! For instance, if your planner has a notes section, use it for brainstorming or jotting down ideas that pop up throughout the day.
Planner Ideas for Beginners
If you’re new to planning, the idea of using a planner can feel a bit overwhelming at first. The good news is that you don’t need a fancy planner or a super-complicated system to see results. In fact, the simpler you keep it in the beginning, the better. Start with a layout that feels manageable, like a weekly or monthly planner, and focus on building consistency over time.
One of the best beginner tips I can give is to treat your planner as a flexible tool, not a rigid set of rules. If something doesn’t work, adjust it. For example, you might start by jotting down a few key tasks each day or using your planner to track one specific goal, like exercise or budgeting. Don’t try to fill every page right away—it’s okay to leave space as you figure out what works best. Over time, you’ll naturally add more details, like meal plans, shopping lists, or even journaling entries.
Here are a few simple planner ideas for beginners:
- Start with a basic weekly or monthly layout to avoid feeling overwhelmed.
- Use a pencil instead of the pen so you can make changes easily.
- Write down only 2-3 main tasks per day to stay focused.
- Add a small “gratitude” section to reflect on positive moments.
- Experiment with sticky notes or a notes section for flexible lists.
Pros and Cons of Starting with a Planner
Getting into the habit of using a planner has plenty of benefits, but it’s also helpful to know what challenges you might face in the beginning. Here’s a breakdown to help you decide if it’s right for you:
| 👍Pros | 👎Cons |
| Increased clarity: Writing things down helps you see everything at a glance, reducing stress | Takes time to build the habit: If you’re not used to planning, it might take a few weeks to make it part of your routine |
| Better time management: You can prioritize tasks and avoid overcommitting | Can feel intimidating: A blank planner can feel overwhelming at first, especially if you’re not sure where to start |
| Sense of accomplishment: Checking off completed tasks feels rewarding and motivating | Might require trial and error: It can take some experimenting to find the right layout or system for your needs |
| Personalization: Planners can be tailored to fit your goals, whether it’s work, hobbies, or personal growth |
While there’s a bit of a learning curve, the benefits of using a planner far outweigh the challenges, especially if you start small and let it evolve with your needs.
Daily Planner Ideas
If you’re looking for inspiration on how to fill out your daily planner, consider these ideas:
- Track your meals
- Plan workouts
- Keep a gratitude log
- Jot down quotes or affirmations
These simple additions can make your planning experience more fulfilling and enjoyable!
Monthly Planner Ideas
For monthly planning, try incorporating:
- A budget tracker
- A habit tracker
- A list of goals for the month ahead
These tools can help you stay accountable and focused on what matters most.
FAQ Section
Here’s a quick FAQ section for common questions about planners:
A beginner-friendly planner is one that’s simple and straightforward. Look for one with clear layouts—either daily or weekly—that allow space for notes and lists.
Aim to update your planner daily or weekly. Set aside time each week (I prefer Sundays) to plan ahead and reflect on what you’ve accomplished.
You can! Digital planners can be just as effective as paper ones. They often come with reminders and are easily accessible from anywhere.
Make planning fun! Use colorful pens, stickers, or washi tape to personalize your planner. The more you enjoy using it, the more likely you’ll stick with it.
Final Thoughts
Learning how to use a planner to organize your life doesn’t mean planning every second of your day. It’s about creating a system that helps you focus, prioritize, and stay on track. When you find a method that works for you, it can reduce stress and give you a sense of control.
If you’re looking for more resources or printables, check out my free downloads available on my website! Happy planning!
